

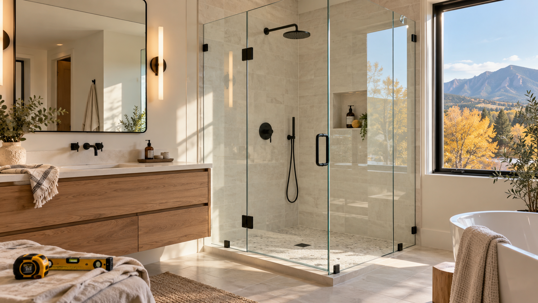
If you have been living with a leaky, cloudy, or dated shower door, October is a good month to finally do something about it. The weather along the Front Range is still mild, the summer rush of outdoor projects is winding down, and there is just enough time to have new glass in place before Thanksgiving guests start asking which bathroom they get. This guide walks through shower door installation in Denver the way we actually do it at Gatsby Glass of West Denver, from the first design conversation to the moment you step into your finished shower.
I grew up on construction sites with my father, who was a carpenter, and one lesson stuck with me. Homeowners are rarely nervous about the finished product. They are nervous about the unknowns in the middle. How long will this take? Will my bathroom be torn apart? What do I need to do before the crew shows up? Below, I answer those questions in order, with notes specific to homes in Lakewood, Wheat Ridge, Arvada, Golden, and the rest of the west metro.
How Long Does Shower Door Installation Take?
The short answer has two parts. The installation itself usually takes a single day for most standard door replacements. The full project, from your first consultation to installation day, typically runs about three to four weeks after final measurements are taken. That gap is not wasted time. It is when your glass is custom cut, tempered, and prepared for your exact opening.
Complex projects can take longer. A steam shower, an unusual angle, a very large panel, or a specialty glass that has to be ordered in can all add time. So can a remodel where the tile is not finished yet, since we cannot take final measurements until the walls and curb are in their permanent state. We will always tell you what to expect for your specific project, and we will keep you updated if anything changes along the way.
The easiest way to think about it is in four stages. Each one has a clear purpose, and knowing what happens in each helps you plan around your own calendar.
Stage One, the Consultation and Design Visit
Every project starts with a free consultation. This is a conversation about how you use the bathroom, what you want it to look like, and what budget range makes sense for you. Some homeowners arrive with a saved photo and a clear plan. Others just know they are tired of the old framed slider with the grimy track. Both are fine starting points.
During the visit, we look at the shower opening, the walls, the curb or threshold, the location of the showerhead and controls, and how the door will swing relative to the toilet, vanity, and bathroom door. A door that looks great in a showroom photo can be a daily annoyance if it bumps the vanity every time you open it. Those are the details a good design visit catches early.
We also talk through style. Many west metro homeowners are moving toward clean frameless lines, while others prefer a semi-frameless look for a slightly lower price point or a more traditional feel. If you want to see options before committing, our online visualizer lets you try different configurations and finishes, and you can browse styles on our glass shower page for West Denver.
What to Have Ready for the Consultation
You do not need to prepare much, but a few things make the visit more productive.
A few photos of shower doors you like, even screenshots, so we can see what catches your eye.
A rough budget range, so we can steer you toward options that fit rather than showing you everything.
Your remodel timeline, if new tile, a new pan, or new plumbing fixtures are part of the project.
A sense of who uses the shower. Kids, aging parents, pets that need bathing, and guests all affect the right door choice.
Any known quirks, such as a wall that has always looked slightly crooked or a curb that sheds water onto the floor.
Stage Two, Final Measurements and Glass and Hardware Selection
Once the design direction is set, the next step is accurate measurement. This is where custom glass differs from a boxed door from a home center. A frameless or semi-frameless enclosure is built to your specific opening, not to a standard size, so the measurements have to be right the first time.
Precision matters more than most people expect. Walls in real homes are rarely perfectly plumb, and floors and curbs are rarely perfectly level. That is especially true in the older ranch homes and split-levels you find throughout Lakewood, Wheat Ridge, and Arvada, where decades of settling can leave a wall leaning slightly out of true. A framed door can hide some of that. A frameless panel will show it unless the glass is cut to follow the actual shape of the opening. Good measurements capture those small variations so the finished door sits evenly and seals properly.
Why Remodels Wait for Finished Tile
If your shower is part of a larger remodel, the timing of this step is the single biggest factor in your schedule. Final measurements need to happen after the tile, the curb, and any wall niches or benches are complete. Tile adds thickness to the walls, and even a small difference in grout lines or trim pieces changes the dimensions of the opening.
That is why we encourage remodeling homeowners to call us early for the design consultation but to schedule final measurements for when the tile work is done. If you are working with a general contractor, it helps to connect us with them so the sequence is clear. A little coordination here keeps the three to four week clock from starting late.
The Selections You Will Make
This is also when your material choices get locked in. The main decisions include the following.
Door style. Frameless hinged doors, semi-frameless doors, sliding doors, pivot doors, and barn-door styles each have a different look, footprint, and price.
Glass type. Clear glass shows off tile, low-iron glass removes the slight green tint you see on the edge of standard glass, and frosted, etched, or patterned glass adds privacy.
Hardware finish. Matte black, brushed nickel, polished chrome, and brass are all common in the west metro. Many homeowners match the finish to their faucets and towel bars.
Glass protection. Ultra Ice Pro is a protective treatment designed to help glass resist the mineral spots that are so common with Front Range water.
Once these selections are approved, your order moves into fabrication. Changes after this point can reset the clock, so it is worth taking a day to think things over before you sign off.
Stage Three, Fabrication and Why Tempered Glass Takes Time
This is the stage homeowners see the least of, and it accounts for most of the waiting. Your glass panels are cut to your measurements, the edges are finished, holes and notches are made for hinges, handles, and clamps, and then the glass is tempered.
Tempering is not optional for shower doors. The U.S. Consumer Product Safety Commission's architectural glazing standard covers shower doors and enclosures specifically and places them in its higher-impact product category, alongside sliding patio doors. The same federal standard defines tempered glass as glass that cannot be cut, drilled, ground, or polished after treatment without breaking. In plain terms, every cut and every hole has to be made before the glass is tempered. Nothing can be trimmed on site.
That is the real reason accurate measurements matter so much, and it is why custom shower glass cannot be produced overnight. If a panel comes out even slightly wrong, it cannot be adjusted. It has to be remade. A careful process up front protects your timeline far more than a rushed one.
The standard also explains why tempered glass is the safer choice. When highly tempered glass breaks, the whole piece crumbles into small particles instead of large, sharp shards. In a wet room where people are barefoot and sometimes a little unsteady, that difference matters.
While fabrication is underway, you do not need to do anything. We will confirm your installation date as the glass nears completion, and you can use the time to plan the prep steps covered below.
Stage Four, Shower Door Installation Day in Your Denver Home
Installation day is the payoff for all of the planning. For most replacements, the crew arrives, removes the old door if there is one, prepares the opening, sets the new glass, installs the hardware, adjusts the door, and seals the enclosure. Most standard replacements are completed in a single day, so you are not left with a half-finished bathroom overnight.
How to Prep the Bathroom
A few small steps make the day go faster and protect your home.
Clear the shower of bottles, razors, caddies, and bath mats.
Clear the vanity top and the floor near the shower so the crew has room to work and set down tools.
Make a clear path from the front door to the bathroom. Large glass panels need room to move through hallways and around corners.
Plan for pets. Dogs and cats are curious, and an open front door plus heavy glass is not a good combination.
Let us know about tight spots ahead of time, such as a narrow stairway to a basement bathroom or a sharp turn at the top of the stairs in a tri-level.
What the Crew Does
If you are replacing an existing door, the old frame, track, and any failing caulk are removed first. On older framed doors, this often reveals years of buildup underneath the track, so the surfaces are cleaned before anything new goes up.
Next comes the mounting hardware. For a frameless door, hinges and clamps are secured to the wall, and it matters what they are anchored into. Heavier frameless glass needs solid support behind the tile, which is something we look at during the consultation, not on the day of install. The panels are then set, leveled, and fastened, and the door is adjusted so it swings cleanly and closes where it should.
The last step is sealing. Clear silicone is applied where glass meets tile or stone, and sweeps or seals are added along the door edges as needed to help keep water inside the shower. Before the crew leaves, they will walk you through how the door operates and how to care for it.
The First Few Days After
The silicone needs time to cure before the shower gets wet. Your installer will tell you exactly how long to wait before the first shower, so plan on using another bathroom for a short period. Once you are back in the shower, good habits help the new glass stay clear.
Ventilation is one of the most important of those habits. The U.S. Environmental Protection Agency advises running the bathroom exhaust fan or opening a window while you shower, since excess moisture is what allows mold to grow in bathrooms. The EPA also recommends keeping indoor humidity below 60 percent, and ideally between 30 and 50 percent. Colorado's dry air helps with that, but a closed bathroom with a steamy shower can still trap moisture around seals and grout lines if the fan never runs.
Hard water is the other daily challenge. Front Range water leaves mineral spots when droplets dry on the glass, and in our dry climate they dry quickly. A squeegee after each shower is the simplest fix. A gentle weekly wipe with a mild cleaner or a vinegar and water mix keeps buildup from settling in. Skip abrasive pads and harsh powders, which can scratch glass and damage protective coatings.
Timing Your Project Before Thanksgiving
Thanksgiving falls on November 26 this year. If you want new shower glass in place before family arrives, the math is fairly simple. Count back three to four weeks from the week before the holiday, and you land in mid to late October for final measurements. That is why October is such a practical month to start.
Here is roughly how a pre-holiday project can come together.
Early to mid October. Schedule your free design consultation and choose your style.
Mid to late October. Final measurements are taken and your glass and hardware selections are confirmed.
Late October through mid November. Your glass is fabricated and tempered.
Mid to late November. Installation day, with a little breathing room before guests arrive.
Every project is different, and material availability can shift the dates, so treat this as a planning guide rather than a promise. The main point is that waiting until mid November to call makes a pre-Thanksgiving install much less likely. If your project includes new tile, add your tile setter's schedule to the front of that timeline.
If the holidays are too tight, that is fine too. Winter is a comfortable time to finish indoor projects in Denver, when the weather keeps everyone inside anyway. Starting the conversation now simply gives you more options.
Local Factors That Affect Installation in the West Metro
Shower doors are installed the same basic way everywhere, but homes in our part of Colorado bring a few recurring conditions that are worth knowing about.
Older Homes in Lakewood and Wheat Ridge
Many neighborhoods in Lakewood and Wheat Ridge were built decades ago, and their bathrooms were often designed around a tub with a curtain or a basic framed door. Converting one of those spaces to frameless glass is very doable, but it may reveal walls that are not quite plumb, older tile that needs attention, or a curb that slopes the wrong way. We look for these things during the consultation so there are no surprises on installation day.
Basement Bathrooms in Arvada, Westminster, and Littleton
Finished basements are common across the west and south metro, and basement bathrooms tend to have lower ceilings, tighter stairways, and smaller openings. Glass can make a small basement bathroom feel much brighter, but it also has to physically get down the stairs. Mentioning a basement location early helps us plan panel sizes and the route into the room.
Mountain Homes in Evergreen, Conifer, and Morrison
Foothills and mountain homes often feature larger primary baths, stone walls, and custom layouts that call for truly custom glass. Stone and irregular tile can make measurements more involved, and some homes on well water deal with even heavier mineral buildup on glass. For these projects, a protective glass treatment and a steady cleaning routine are especially worthwhile.
Dry Air and Big Temperature Swings
Denver's climate brings sunny summers, cold winters, and very dry air for much of the year. Well-sealed shower glass helps keep steam and warmth in the shower on cold January mornings, and quality seals and precise installation help reduce drafts in bathrooms on exterior walls. The dry air also means water spots form quickly, which is one more reason to keep a squeegee within reach.
How to Choose a Shower Door Installer in the Denver Area
Not every glass project goes smoothly, and most of the problems we are called to fix trace back to rushed measurements, weak wall support, or poor sealing. When you compare installers, a few questions tell you a lot.
Do they measure after the tile is done? Any installer who is happy to measure before a remodel is finished is taking a risk with your glass.
Do they use tempered safety glass? The answer should be an immediate yes.
Can they show you options before you commit? Visual tools and samples help you avoid expensive second thoughts.
Will they explain the timeline in stages? A clear process is a good sign of an organized team.
What do past customers say? Reviews that mention communication and cleanup are just as valuable as reviews about the finished look.
At Gatsby Glass of West Denver, we are based in Wheat Ridge and work throughout Lakewood, Arvada, Golden, Littleton, Westminster, and the foothills communities. You can read what local homeowners have said about working with us on our West Denver testimonials page.
Frequently Asked Questions About Shower Door Installation in Denver
How long does shower door installation take in Denver?
Most standard shower door replacements are installed in a single day. The full project usually takes about three to four weeks after final measurements, since custom glass has to be cut, prepared, and tempered before it can be installed. Complex projects or special-order materials can take longer.
Can I use my shower the same day the new door is installed?
Usually not right away. The silicone seals need time to cure before they get wet. Your installer will tell you how long to wait, so plan to use another shower for a short period after installation day.
Do I need to finish my tile before the shower door is measured?
Yes. Final measurements should happen after tile, curbs, benches, and niches are complete. Tile changes the size and shape of the opening, and tempered glass cannot be trimmed after it is made, so measuring too early risks a door that does not fit.
Why can't the installer just cut the glass on site?
Shower doors must use safety glass, and tempered glass cannot be cut or drilled after it has been tempered without breaking. Every cut, notch, and hinge hole has to be made at the fabrication stage, which is why accurate measurements are so important.
When should I schedule a shower door installation to finish before Thanksgiving?
Aim to have your consultation in early October and final measurements by mid to late October. That leaves room for the typical three to four week fabrication window and an installation before the holiday. Remodels with new tile should start even earlier.
What is the best way to keep new shower glass clear with Denver water?
Squeegee the glass after each shower, run the exhaust fan, and wipe it weekly with a mild cleaner or a vinegar and water mix. A protective glass treatment helps the glass resist mineral spots, and avoiding abrasive cleaners protects both the glass and the coating.
Start Your Shower Door Project This Fall
If you are ready to replace a tired shower door or add glass to a new remodel, the best first step is a free design consultation with our team. We will look at your space, walk you through options, and give you a realistic timeline, including whether a pre-holiday install is possible. Visit Gatsby Glass of West Denver to explore our work, call us at (303) 529-1737, or request your free consultation online. We look forward to helping you enjoy a shower you love walking into.